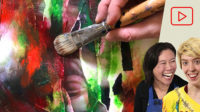
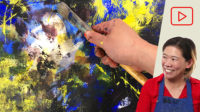
Art Prof Clara Lieu demonstrates how to create an image transfer using a gelli plate, acrylic paint, and magazine pages.
- 1 min. short (printmaking paper)
- 1 min. short (paper shopping)
- 91 min. video (tutorial)
Prof Lieu explains the process from beginning to end, emphasizing techniques which will provide many opportunities to explore the potential behind this exciting printmaking technique.


Video Walkthrough
- This transfer process produces a very wide range of results.
- Some images will create very crisp results, others are more muddled.
- High contrast magazine images tend to get the best results.
- Start with black printing ink first so you understand the full value of this technique.
- Pick your images from magazine first so they are ready to go.
- Have all your supplies set up so you can work quickly, the acrylic paint tries fast.
- Soaking your paper in advance helps the acrylic paint get absorbed better.
- Use blotters or a towel to blot your paper so it’s not soaking wet.
- There are recipes online for creating your own homemade gelli plate.
- When rolling the acrylic ink on the plexiglass, roll in all different directions for even coverage.
- Experiment with different colors and thicknesses of acrylic paint, it takes a while to get the hang of it!
- When pressing the paper into the gelli plate, don’t ignore the edges.
- After you pull your print, take some time to analyze the print and see how the print came out.
- This technique is great as a starting point for a drawing or a painting.
- Create a registration sheet with cardboard, and acetate so it’s easy to make your print even.

Art Supplies
- Liquitex BASICS Acrylic Paint
- Gelli Arts Gel Printing Plate 5X7
- Plexiglass
- Speedball Breyer (2 is better)
- Rives BFK White Printmaking Paper
- Scotch-Brite Non-Scratch Scrub Sponges
- Winsor & Newton Slow Dri Medium (optional)
- Wide flat tray, for soaking paper
- Bath Towel, for blotting the Rives BFK Paper
- Dish Soap, for cleaning the gel plates
- Blotters & newsprint for drying/flattening prints

As a free educational source, Art Prof uses Amazon affiliate links (found in this page) to help pay the bills. This means, Art Prof earns from qualifying purchases.