This is a comprehensive guide for how to photograph your 2D & 3D artwork, showing common problems and with practical techniques to achieve photos that will accurately represent your artwork.
Photographs of your work can make or break your portfolio. Poor lighting, inaccurate colors, and sloppy edges and more can make a strong painting look very bad.

Expect to invest much more time into this process, especially if you don’t have tons of experience. Don’t leave it until the last minute! You’ll be quickly overwhelmed by the logistics and having to rush.
Instead, shoot photos as you finish pieces so that you can do this process incrementally over a period of time.
Prof Lieu’s Tips

Photographing 3D artwork is especially tricky, and much less straightforward than shooting a 2D artwork.
Lighting is incredibly important when shooting 3D artwork ! In most cases, natural light that is diffused from a window will get you the most accurate color.
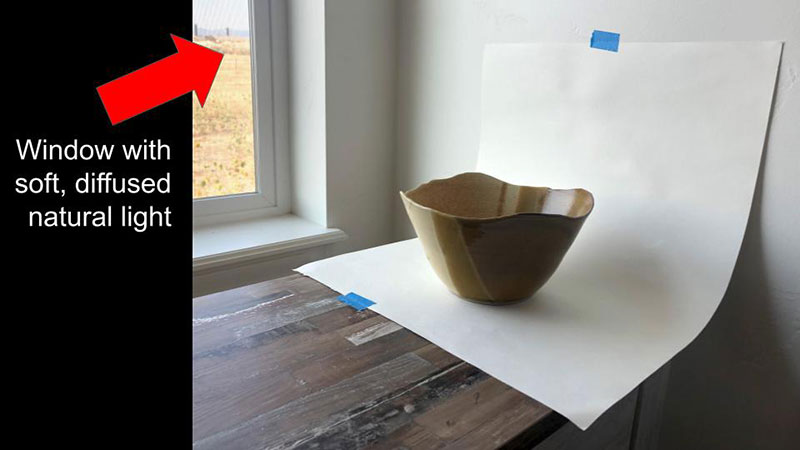
Don’t shoot indoors with regular incandescent lights, which tend to make images look too yellow.
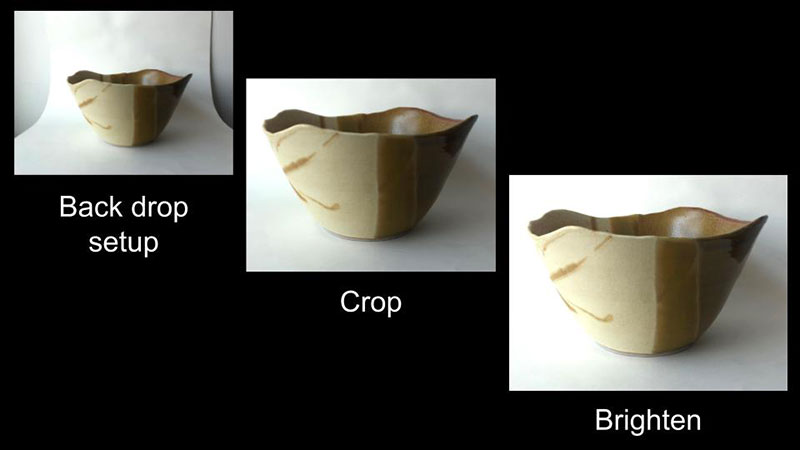
I use watercolor paper for the backdrop, or something like Bristol board works too. Thicker paper is better as it’s much less likely to wrinkle and therefore can be used often.

Equipment
High end photography with a DSLR camera and professional lights is not necessary. Most smart phones now shoot photos that will work just fine.

Find out what’s bringing down your portfolio
Learn what you can do to distinguish yourself from thousands of other applicants!